Hello Happy New Years Eve,
Are you all ready for a New Year ? I know I certainly am, wow these past two years have been challenging to say the least, but like with anything else, we find a way to push through to brighter days :) "Whatever happened over this past year. Be thankful for where it brought you. Where you are is where you're meant to be. "
I wanted to Send you all Happy 2022 Wishes! I hope this New Year finds you Healthy, Grateful, and full of abundance of all that is to come in the year ahead.Remember the special ones that have been lost, and feel fourtunate that you had them in your life, because you can't trade those moments for anything. Lets spin 2022 into a great year together, Do you set resolutions or pick a word of the year ? Please comment and share yours :)

So you ask, when will i resume all the crafty fun? Have no fear my Friends Bailey's & Tea - Create a Card With Me Facebook morning show will return January 8th and with our New January - June Catalouge going LIVE on January 4th I will have so much goodness to share with you! I am starting off with a fun Desk Calandar Project to get the New Year started off right, I hope you enjoy and create on of your own, cause how can this not get you inpired everyday :)
New Year
Desk Calendar
Supply List:
·
Scalloped
Contours Dies & Tailored Tag Dies.
·
Stamp
Sets: Days to Remember & Create with Friends.
·
Ink:
Memento Black, Bermuda Bay, Flirty Flamingo, Granny Apple Green, Misty Moonlight, Mango Melody, Magenta Madness.
·
Flirty
Flamingo Metallic Ribbon.
·
Tear
‘n’ Tape, Glue Dots, & Stampin’ Seal.
·
Retired
Cleaver Clasp – or substitute a Square Brad ( just something to hold calendar months,
with the Brad you will also have to make a hole at the top of your calendar
months to hang.)
·
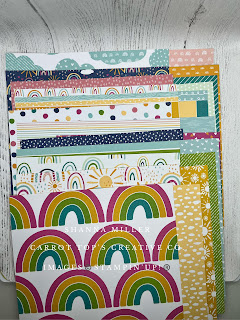
SAB
Sunshine & Rainbows 6x6 DSP.
·
Mini
Post It Stack.
Dimensions:
·
Flirty
Flamingo Card Stock Base Layer 4 ¼’ x
11’ , score at 2 ¾’ & 5 ½’.
·
Basic
White Card Stock Layer 4¼ “ x 5 ½’ ”.
·
Basic
White Card Stock 1 full sheet & 1/2 sheet for die cuts with Scalloped
Contours Dies. (calendar bases)
·
Basic
White Card Stock 4’ x 3’ for Stamping & Die Cut with Tailored Tags.
·
2
Sheets of DSP that coordinate, Cut to 4’
x 5 ¼’.
·
Cut
& Emboss Machine with cutting plates.
Instructions:
·
Take
your Basic White Card Stock sheets cut down to ½ sheets and sandwich in plates
with the Scalloped Contours Die ( one with the scallop outside and stitched
inside edge), turn through the Cut & Emboss Machine. You will need to cut
12 of these for your calendar months.
·
Then
Layer your Largest Tailored Tags Die on your 4’x 3’ piece of Basic White Card
Stock, sandwich in the plate layers and run that through the Cut & Emboss
Machine.
·
Using
the Days to Remember Stamp Set, stamp in Black Memento Ink all of your calendar
months, and using the other Ink colors stamp out the months names in different
colors.
·
With
the Create with Friends Stamp Set and Flirty Flamingo Ink stamp “create” on
your Tailored Tag Diecut. And the words “you’re” & “best” in Granny Apple
Green & Bermuda Bay ink on the leftovers of your 4’x 3’ Basic Whites Card
Stock piece. Fussy cut out your stamped
“you’re’ & “best”.
·
Out
of the Sunshine & Rainbows DSP fussy cut out a rainbow.
·
On
your Flirty Flamingo Base attach with Stampin’ Seal the DSP you chose as the bottom layer, and on
the Basic White Card Stock 4 ¼’ x 5 ½’ Piece attach with Stampin’ Seal the other DSP
you chose.

·
Attach
with Tear ‘n’ Tape to the easel front, your Basic White 4 ¼’ x 5 ½’ DSP layered
piece. This is going to be the front of the stand. I used my calendar cut outs
as a marker for where I wanted to attach down my post its, by placing them in
the back pocket created by the easel front. I used the width to know where to
stick down my mini post it stack with Tear ‘n’ Tape, they now act as a stopper
for your easel front. And all your calendar months are tucked away safely in
the back for storage & ease of changing out monthly. 😊
·
Next
Determine where your tag will sit at the front and make sure you have enough
room for your monthly calendar. Attach the tag down with Stampin’ Seal.
·
With
dimensionals on the back of your Rainbow cut out apply that to the front where
you like it, also attach with dimensionals your fussy cut words.
·
Tie
a bow with the Flirty Flamingo Metallic Ribbon, with a glue dot attach over the
hole of the tag die cut.
·
Lastly,
with a glue dot attach your Cleaver Clasp or make a hole for your Brad to hang
your calendar months off.

Your extra months can tuck in behind, ready to change out month after month :)
Again HAPPY NEW YEAR!!!!! I will see you all soon.
Cheers & Paper Hugs,
Shanna